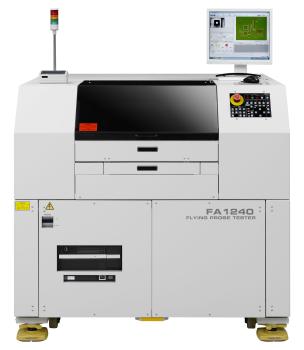
Hioki Flying Probe Testers: FA1240
Key Features
Ultra-High speed measuring
Measuring rate up to 40 steps per second helps reduce tact times and can actually be used in fully automated production lines averting a bottleneck. This is indeed a unique strength of Hioki’s flying probe testers.
Fine pitch inspection
Accurately and consistently test down to a lead pitch of 0.15 mm. This allows inspection of fine-pitch components that fixture based testers cannot execute reliably.
Supplementary vision inspection
Supplement overall inspection strategy with Hioki’s standard vision function allowing for component presence/absence check, as well as polarity anddisplacement confirmation.
User-friendly interface
A completely revamped Windows 7 based user interface makes use of graphics-rich environment making productivity very intuitive and efficient. Competent and reliable testing achieved regardless of operator.
Wide inspection area
Wide range of board sizes can be inspected from 2&rdquot; x 2&rdquot; to 20&rdquot; x 18&rdquot;.
Automatic position compensation function
Standard feature working in conjunction with high-precision mechanism that enables probing with extremely high accuracy. Debug process is simple and precise with use of a CCD camera for teaching data coordinates and creating offsets.
A wealth of options
A range of options and accessories available. An optimum system can easily be constructed to cater to customer needs.
Programming methods
- UA1780 FITLINE Data Creation Software (Hioki’s alternative to CAD based method, ideal for EMS companies and CMs.)
- CAD conversion software (Siemens Test Expert)
- Gerber data creation system (Hioki’s alternative to CAD based method, ideal for EMS companies and CMs.)
- Manual teaching using CCD camera.
UA1780 FITLINE Data Creation Software
Intuitive and user friendly software that helps create test data. The usage of Gerber allows the software to understand the circuitry of your board and broadens test capabilities, being able to select alternative test points when one is physically non accessible. Comes equipped with pre-installed parts library which also helps reduce test generation time significantly.
UA1782 FAIL VISUALIZER
Analysis software to help investigate your failures. Immediately pin points the failed component and patterns from test results.
In-line ready
Hioki’s flying probes comes with the PCB conveyer as a standard making it always in-line ready which makes it easy to integrate it into an automatic inspection system. Interface with up/downstream can be selected to the customer’s liking including SMEMA compatibility.
High probing accuracy
Probing accuracy of ±100 µm and movement repeatability accuracy of ±50 µm, ideal for testing fine pitch assemblies for both shorts and open circuits.
Test order optimization
To minimize mechanical travel distance of the probes, the test order sequence is automatically optimized to increase efficiency and ultimately reduce cycle times.
Bad mark detection
The equipped CCD camera can be used for detection of inspection marks used for multiple-sample boards as well as inspection only involving the step of image detection of marks.
Coordinate data teaching
The standard equipped camera can be used for simple and accurate coordinate data input and data revision for debugging.

Los Angeles
21241 S. Western Ave. Suite 140
Torrance, CA 90501
United States
Request for Quote
At Seika, we provide custom quotes tailored to meet your exact specifications, ensuring high-quality and reliable solutions for your manufacturing and industrial needs.
Related Products
At Seika, we provide custom quotes tailored to meet your exact specifications, ensuring high-quality and reliable solutions for your manufacturing and industrial needs.


